Embroidery Experiments: For My 🩷 Technique Geeks 🩷
I’ve been reflecting on the results of my experiments in embroidery that I did for Februllage, and we’ve now arrived at the part where I go deep into what I learned — about my stitching substrate and about image transfer techniques.
There are applications for this outside of fiber arts, but if you are not interested in mixed media generally, you may want to skip this one. If you’re interested in what I learned about the creative process generally, check out what I wrote about “the clench” and if you want more detail, this about my experiments in planning.
Primed canvas sucks for embroidery but you can make it easier.

The first four pieces pictured above were all cut from a large piece of unstretched but primed canvas that I gratefully received as a castoff from a friend. I actually thought I would do the entire project on this fabric — I have plenty — but quickly found that working on primed canvas was very hard on my hands. (Hand preservation is an issue, especially at my age!)
I was not very interested in the primed side, preferring the natural fabric color in this project. So the primer was truly useless to me. I could have sanded it off, but I was interested in seeing if I could use it in this way — because I do love painting with acrylics, and some of my newer ideas involve combining embroidery with painting.
But this is not the way! The whole idea of primer is to fill the gaps between the woven fibers, so the paint doesn’t seep through, and to stiffen the rest of the fiber so that it absorbs less paint and allows it to sit nicely on the surface. Whereas surface embroidery requires a needle to push aside the fibers repeatedly.
The conflict is clear: pushing a needle through primed canvas is not easy and it’s not fun.
I did try a few workarounds — I really do have a lot of this primed canvas — and I discovered was that lightly sanding the primed side removes enough to make it a bit easier to stitch through.
I couldn’t tell it had been sanded visually. Of course this is just solid white so it’s not a good test, but my guess is that a painted canvas could be sanded and then stitched through more easily without entirely losing the image.
As for what I used: 3M’s Softback Sanding Sponges. The specs say the grit ranges from 800 to 1500, although they use words to differentiate their grits rather than numbers. I used the “medium” and then “superfine”. These things can be used wet or dry and last forever — these are actually the same pads I used for jewelry making a decade ago and they’ve still got loads of life in them.
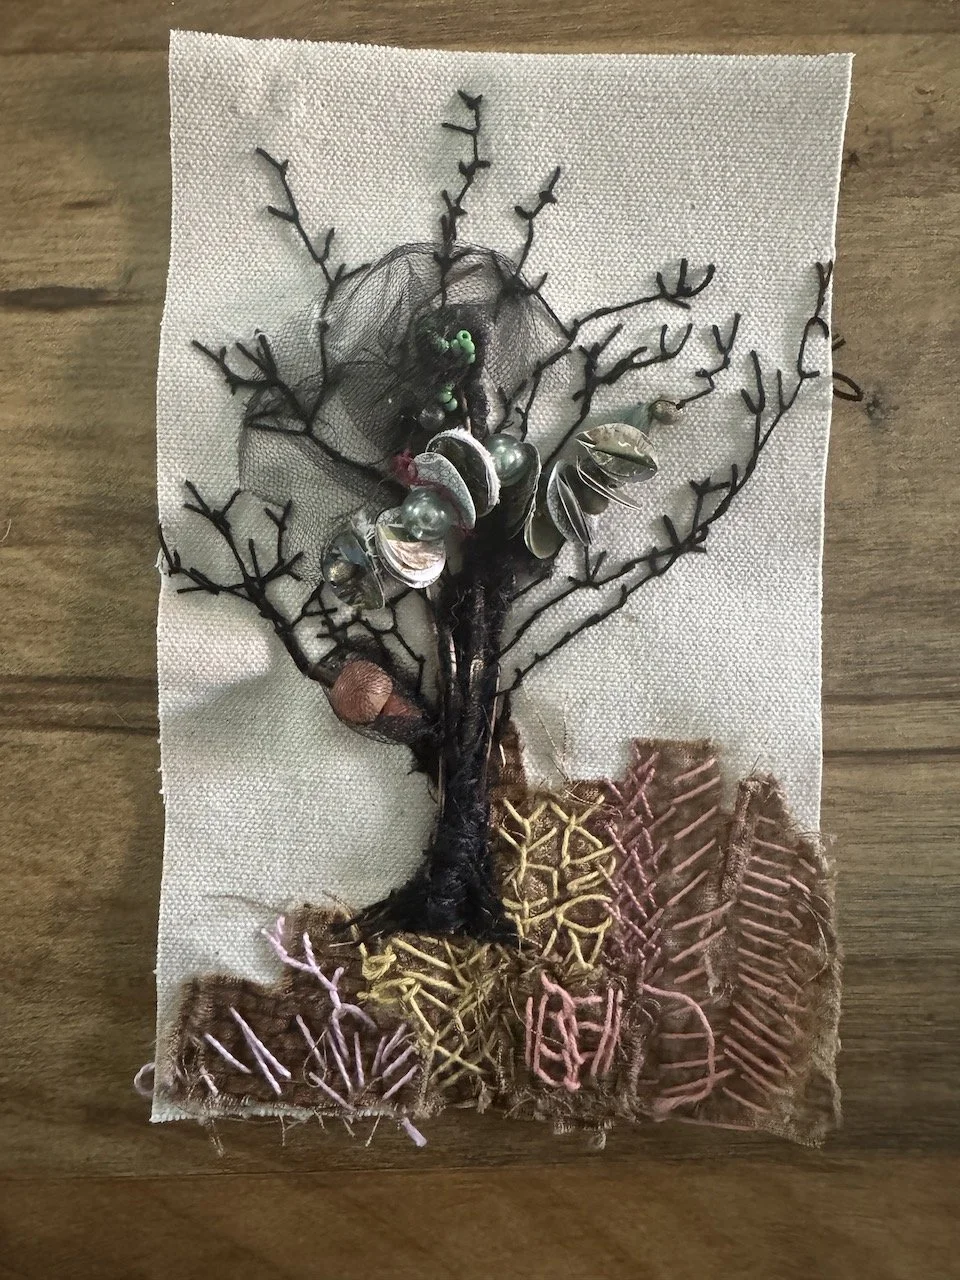
What worked the very best was sanding plus wetting the canvas. For the shell piece, I sanded the primed side, then flipped it to the raw working side and painted with acrylic inks. This combination made it WAY easier to stitch through, almost worth doing again.
But I probably won’t. I can paint on fabric without primer! And it was a relief to return to regular untreated fabric again.
Image Transfers, Three Ways
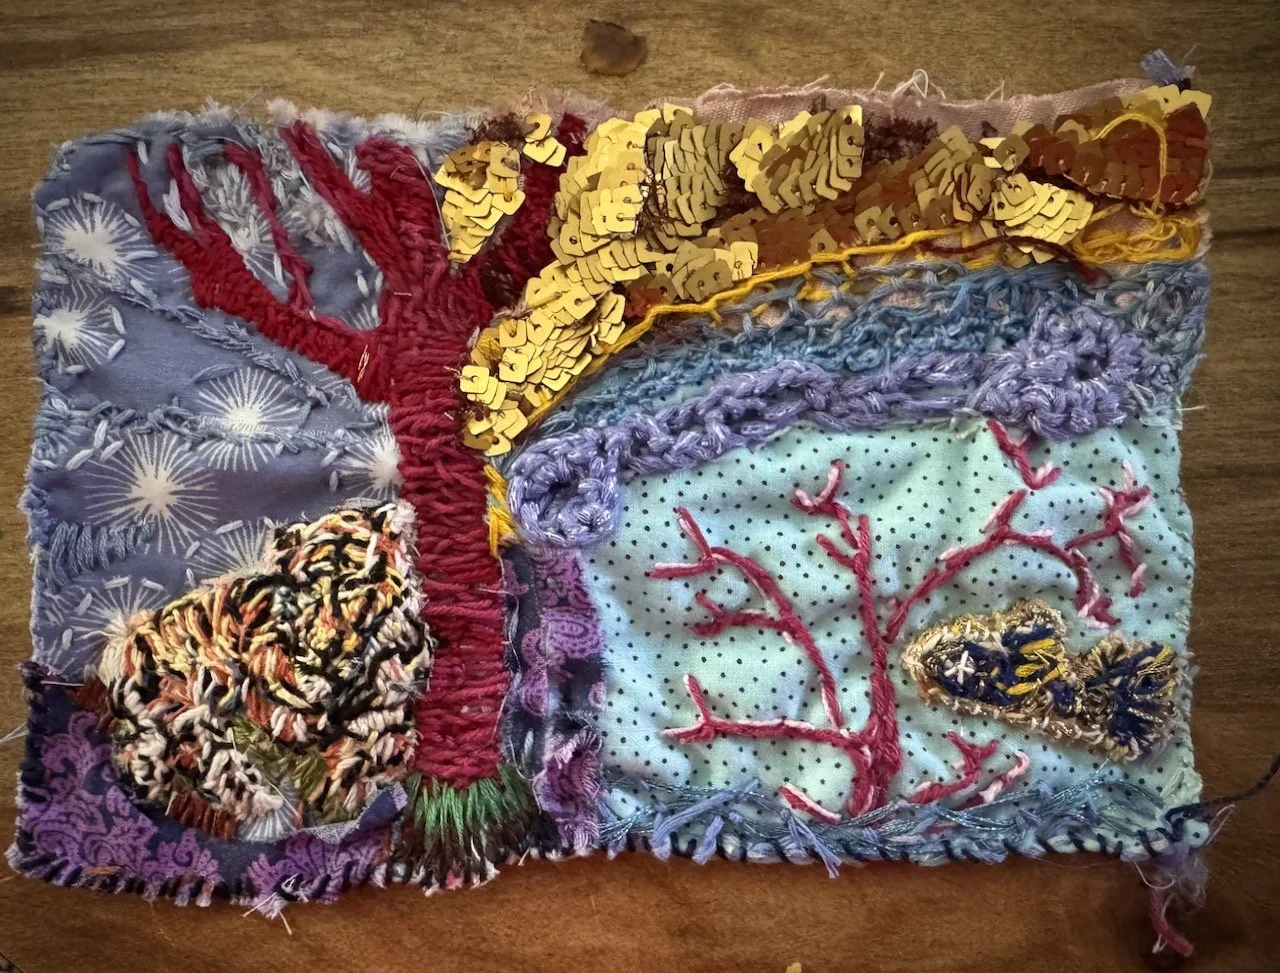
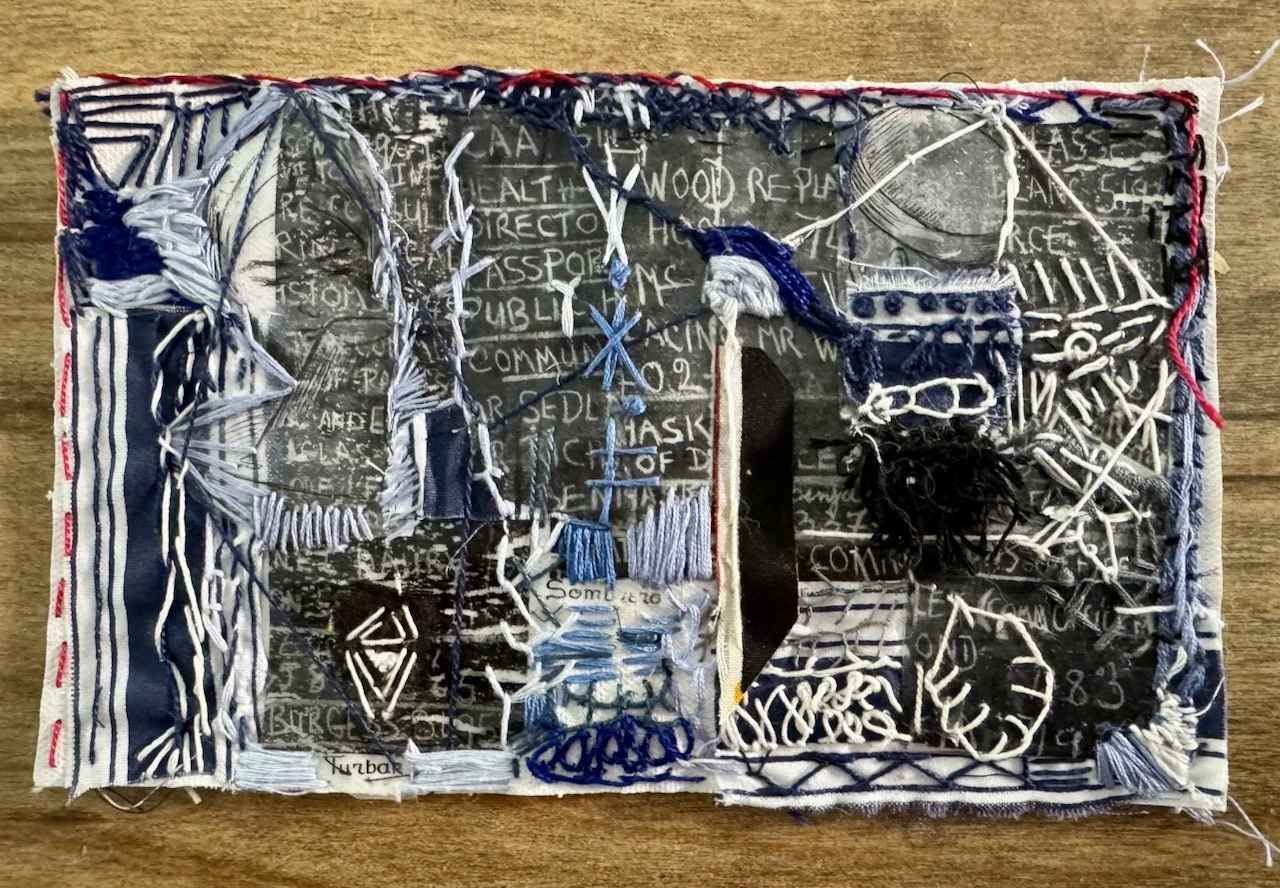
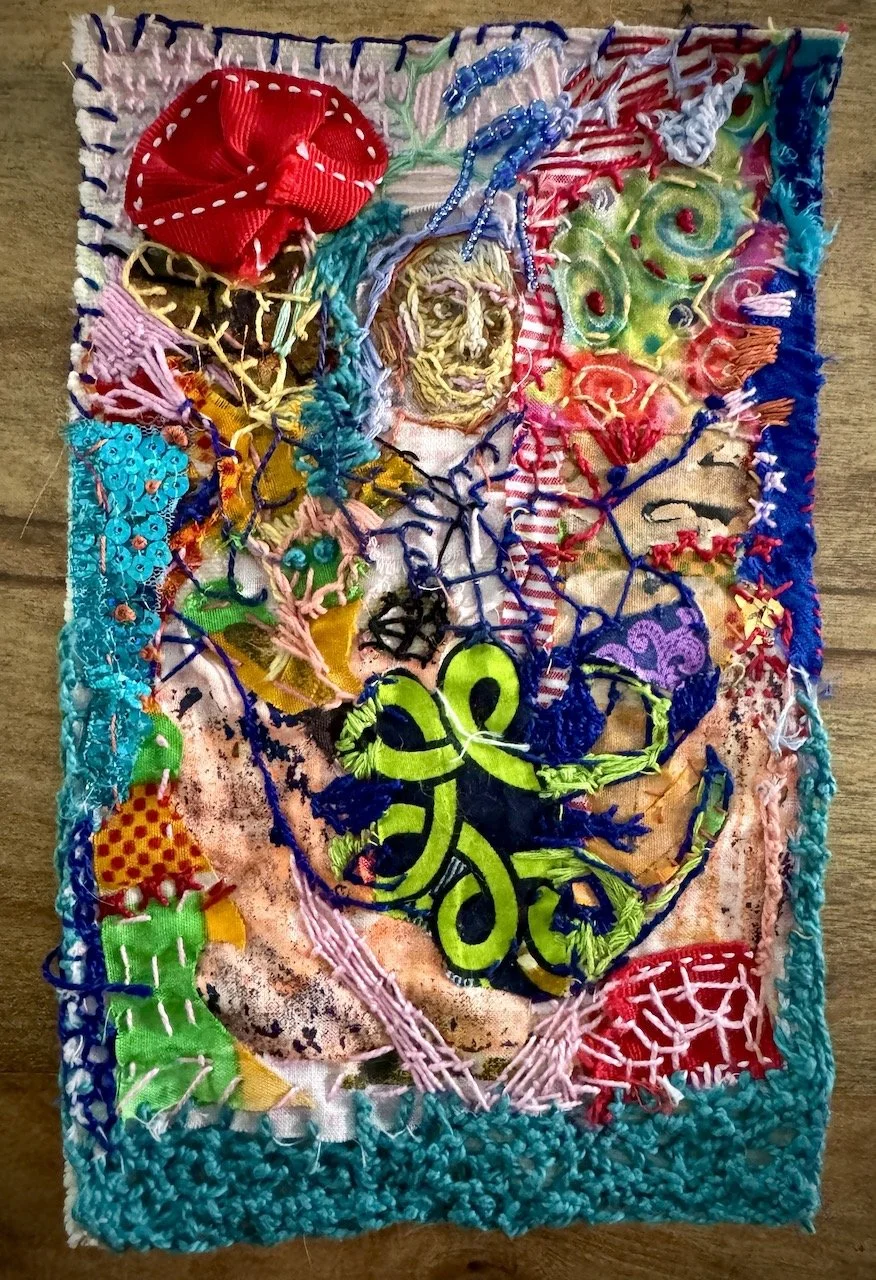
(From Left to Right: School, Chaos, Tiger, Lost.)
In several of these pieces I experimented with image transfers — a process by which you permanently imprint a printed image or photograph onto fabric.
1- PACKING TAPE TRANSFERS
I used packing tape transfers for the “school” prompt. This is a technique I’ve worked with plenty in my collage work on paper, but I’ve never tried to stitch through it and I was curious how it would work.
To make a packing tape transfer, you just stick the image down on some regular packing tape, let the thing soak in water for as long as you can — overnight is optimal, I actually forgot it for a couple of nights and that was even better.
Then rub off the paper pulp, theoretically just leaving the ink on the plastic, which you can now use as you desire. (I’d say you have a translucent sticker, but much of the tape’s stickiness will be gone from this process.)
Most transfer processes will reverse your image, but this one doesn’t so it’s generally very good for text.
Conclusion: This actually worked much better than I thought it would! I tested poking a needle through packing tape before I did the transfer so I knew I could stitch through it very easily. I was worried that it would split, though. That didn’t end up happening although there were a couple of times I thought it might.
The one thing to bear in mind is that you are essentially perforating the tape— so if you perforate all the way around a shape it will detach. This isn’t the world’s biggest problem if you are stitching it into the base fabric, but it’s still best not to completely enclose a shape with stitch.
I liked the contrast of the smooth shiny plastic layer with the fabric — both the base layer and the fabrics I added. I particularly enjoyed the contrast of the shiny plastic with the more subtle sheen of the stranded embroidery thread. I will be using this again.
2-ESSENTIAL OIL TRANSFERS
To create an essential oil transfer, you take a laser copy print out of an image, daub with peppermint oil, and then burnish TO release the toner from the paper onto the fabric. You can achieve a similar result with other solvents, including acetone (nail polish remover) and CitraSolv, but peppermint oil smells better and isn’t noxious to inhale.
In both “Chaos” and “Tiger” I used printed scans of sketchbook pages, the Chaos printout was older, and the Tiger one was printed for this purpose.
The image came through clearly both times. But the transfer is very delicate and can’t stand up to much handling, at least not initially and probably not ever.
In Chaos, I wanted to just add a little stitch the face, but as I handled it, it smudged into a kind of dirty grey, so I covered the whole thing in stitch. I wondered whether the smudging was caused by the age and size of the print out, so in Tiger I printed a larger image just before transferring.
Reader, it still smudged. Once again I had to stitch densely to cover the gray blob.
Conclusion: this transfer process is fine if you want to applique an image onto fabric, handle and stitch it by the edges and leave it at that.
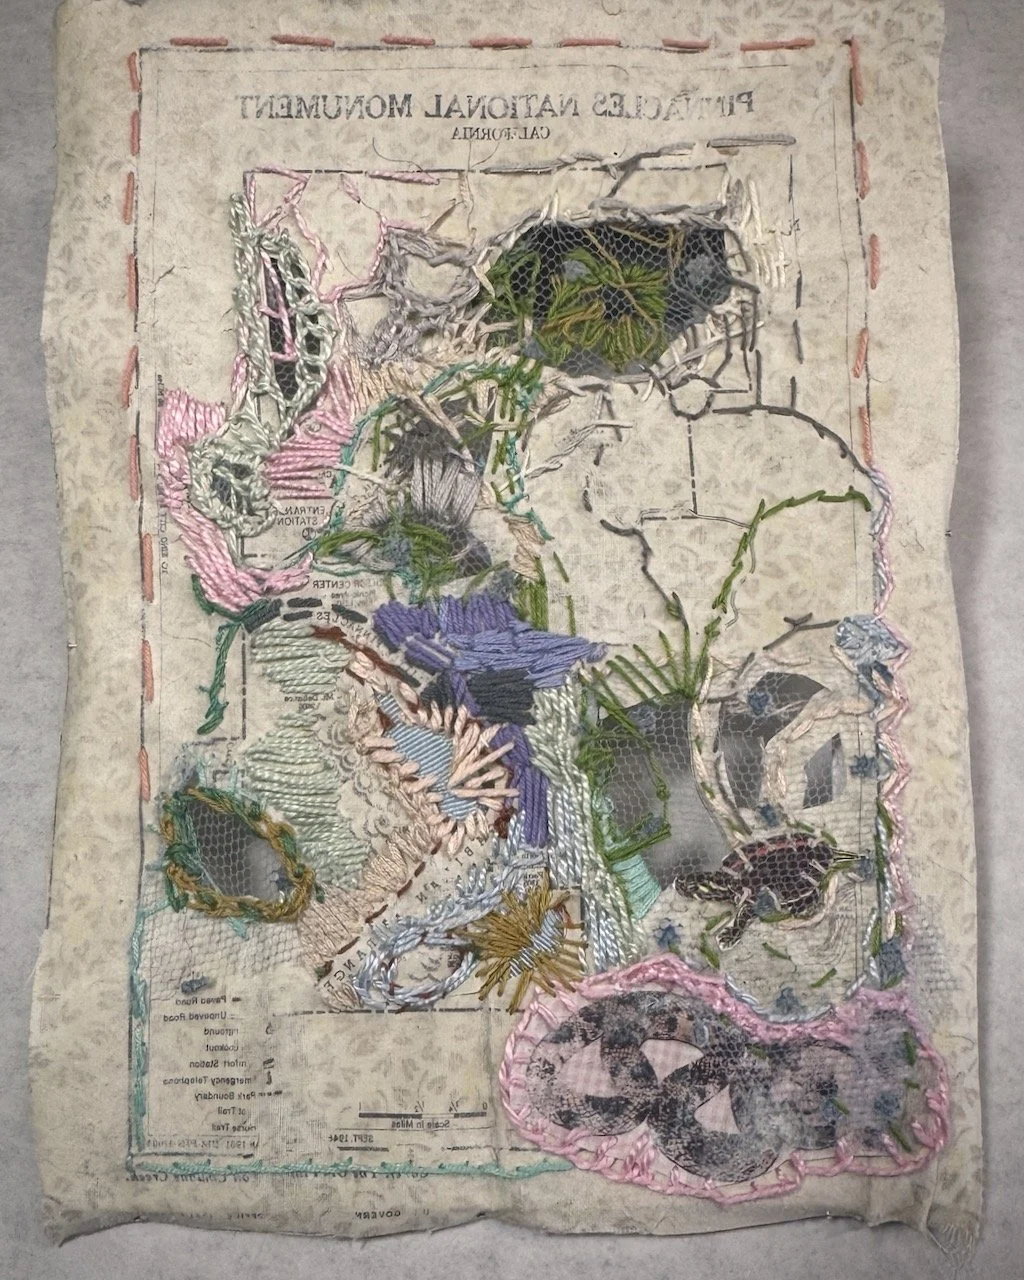
3- ACRYLIC GEL TRANSFERS
For “Lost” I used an acrylic gel transfer of a vintage map. This is a process that is the inverse of a packing tape transfer — the clear acrylic gel is painted on top of the image, allowed to dry, and then the paper pulp is removed, but from the front rather than the back so what’s left is reversed. You can see the reversed type in this one. I liked it very much for this notion of an unusable map.
The issue I had here was similar to the issue of working on the primed canvas — it was hard to stitch through. It was pretty much like sewing into thick paper. If you make an errant stitch and pull it out the needle hole would remain, since the fibers of the fabric were stiff and can’t just relax back into place.
I didn’t try sanding the back, which would be a thought if I ever try to do this again. I did try sanding on the front of the image to remove the paper pulp faster, which was a mistake and took away more of the image than I’d have liked.
Conclusion: While you can handle these transfers without the smudging issue, the stiffness of the medium means they scan only take minimal stitching after that.
Note: This is part of a small series reflecting on a month of embroidery experiments. Previously, I looked at how I feel about planning a piece ahead of time, and happened when I experimented with making a plan.